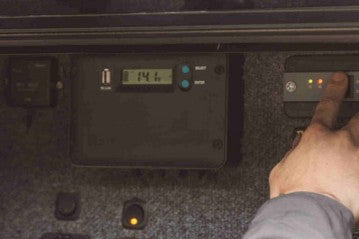
Understanding MPPT Solar Charge Controllers
Before we dive into the sizing process, let's take a moment to understand what an MPPT solar charge controller is and how it works.
MPPT (Maximum Power Point Tracking) solar charge controllers are more efficient than PWM (Pulse Width Modulation) controllers because they use advanced algorithms to maximize the amount of power that can be harvested from solar panels. MPPT controllers can take in higher voltage inputs from solar panels and convert them to a lower voltage output to charge a battery. This higher voltage input allows for the use of smaller, less expensive wiring, and the lower voltage output is better matched to the battery, allowing for more efficient charging.
Sizing an MPPT Solar Charge Controller
Now that we understand the benefits of using an MPPT solar charge controller, let's dive into the process of sizing one for your solar electric system. The size of an MPPT solar charge controller is determined by several factors:
1. Solar panel voltage and current
The voltage and current output of your solar panels will determine the maximum input voltage and current that your MPPT solar charge controller needs to be able to handle.
2. Battery voltage
The voltage of your battery will determine the output voltage of your MPPT solar charge controller. Be sure to choose an MPPT controller that matches your battery voltage.
3. Charge current
The charge current is the amount of current that your MPPT controller will need to output to charge your battery. This is determined by the size of your battery and how quickly you want to charge it.
To calculate the appropriate size of an MPPT solar charge controller for your system, follow these steps:
STEP 1
Determine the maximum input voltage and current of your solar panels. This information should be available in the solar panel specifications.
STEP 2
Determine the voltage of your battery.
STEP 3
Determine the charge current you need to charge your battery. This can be calculated by dividing the capacity of your battery by the number of hours you want to charge it in.
STEP 4
Multiply the maximum input voltage by the maximum input current to get the maximum input power of your solar panels.
STEP 5
Multiply the maximum input power by the efficiency of your MPPT solar charge controller (typically around 95%) to get the maximum output power of the controller.
STEP 6
Divide the maximum output power by the voltage of your battery to get the maximum charge current of the controller.
STEP 7
Choose an MPPT solar charge controller that can handle the maximum input voltage and current of your solar panels, matches the voltage of your battery, and can output the maximum charge current you need.
Tips and Best Practices
When selecting an MPPT solar charge controller, there are a few additional considerations to keep in mind:
1. Future system expansion: If you plan to expand your solar electric system in the future, choose an MPPT solar charge controller that can handle the maximum input voltage and current of your future solar panels as well.
2. Temperature range: Make sure your MPPT solar charge controller can operate within the temperature range of your location. Some controllers may have a lower or higher temperature range than others.
3. Brand and warranty: Choose a reputable brand of MPPT solar charge controller and check the warranty to ensure you have proper coverage in case of any defects or malfunctions.
ECGSOLAX is truly a leading supplier of solar controllers and inverters, and has been committed to providing high quality MPPT solar charge controllers (Max efficiency ≥98.1%, PV utilization ≥99%). Believe our products will be your choice!
Conclusion
Sizing an MPPT solar charge controller is an important step in creating a reliable and efficient solar electric system. By understanding the key factors that determine the size of an MPPT controller and following the steps outlined above, you can ensure that you choose the right controller for your specific needs. Remember to always double-check your calculations and refer to the manufacturer's instructions for specific guidance. With the right setup, you can enjoy the benefits of renewable solar energy for years to come.

0 comments