Solar power systems have become increasingly popular due to their environmental benefits and cost-saving advantages. Central to these systems is the solar inverter, which converts the direct current (DC) produced by solar panels into usable alternating current (AC) electricity. However, to ensure the smooth and safe operation of your solar inverter, it is essential to protect it from potential power surges originating from the battery. In this article, we will explore effective methods to prevent inverter surge off of the battery, address common concerns related to inverter placement and functionality, and provide guidance on the necessary precautions for optimal performance.
1. How Do You Protect an Inverter from A Power Surge?
Power surges can occur due to various factors such as lightning strikes, utility grid fluctuations, or equipment malfunctions. To safeguard your solar inverter from power surges originating from the battery, you can employ the following measures:
a. Surge Protectors: Install surge protectors between the battery and inverter to absorb and redirect voltage spikes, ensuring they do not reach the inverter. These devices act as a barrier, diverting excess energy and safeguarding the sensitive components of the inverter.
b. Voltage Regulators: Utilize voltage regulators to stabilize the voltage supplied to the inverter. These devices regulate the voltage and ensure a consistent power supply, preventing voltage fluctuations that may harm the inverter.
c. Grounding: Ensure proper grounding of your solar power system. Proper grounding helps to dissipate excess energy and provides a path for electrical discharge in the event of a power surge, minimizing the risk of damage to the inverter.
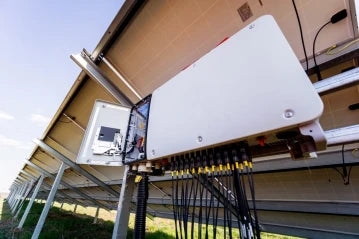
2. Should an Inverter Be Close to the Battery?
Ideally, it is advisable to place the solar inverter in close proximity to the battery to minimize power losses and voltage drops. When the distance between the inverter and battery increases, the length of the cable connecting them also increases. Longer cables can result in increased resistance, leading to voltage drops and reduced efficiency. Therefore, keeping the inverter close to the battery reduces cable length, minimizes power loss, and optimizes system performance.
3. Why Does My Inverter Spark When I Connect It to the Battery?
If you observe sparks when connecting your inverter to the battery, it is crucial to address the issue promptly to prevent damage and ensure safety. The sparking phenomenon can occur due to the following reasons:
a. Incorrect Wiring: Check the wiring connections between the battery and inverter to ensure they are correctly installed. Faulty or loose connections can create sparks, leading to potential damage to the inverter.
b. Polarity Mismatch: Verify that the positive and negative terminals of the battery are correctly connected to the respective terminals on the inverter. Reversed polarity can result in sparks and pose a significant risk to the inverter.
c. Battery Issues: If the battery itself is faulty or damaged, it may cause sparking during the connection process. In such cases, it is essential to inspect the battery and replace it if necessary.
4. Why Is My Inverter Tripping Off?
Inverter tripping can occur due to various reasons, including:
a. Overload: If the inverter is subjected to excessive power demand, it may trip to protect itself from damage. Ensure that the electrical load connected to the inverter does not exceed its rated capacity.
b. Short Circuits: Short circuits in the wiring or connected devices can cause the inverter to trip. Inspect the wiring and connected devices for any signs of damage or faulty connections.
c. Overheating: Inverters have built-in temperature sensors that monitor internal heat levels. If the temperature exceeds the safe operating range, the inverter may automatically shut down to prevent damage. Ensure proper ventilation and airflow around the inverter to prevent overheating.
5. Do I Need a Fuse Between the Inverter and Battery?
Yes, it is highly recommended to install a fuse or circuit breaker between the inverter and battery. Fuses act as protective devices, interrupting the flow of electricity in the event of a short circuit or overload. They provide an additional layer of safety by preventing excessive current from damaging the inverter or other components. Consult a professional electrician to determine the appropriate fuse size based on your system specifications.
6. What Should I Keep Under My Inverter Battery?
To maintain the longevity and safety of your solar inverter battery, consider the following:
a. Adequate Ventilation: Ensure that the area beneath the inverter battery is well-ventilated. Excessive heat can reduce battery performance and lifespan. Good airflow helps dissipate heat and prevents overheating.
b. Dry and Stable Surface: Keep the battery on a dry and stable surface to avoid moisture damage or accidental spills. Moisture can corrode battery terminals and affect performance.
c. Temperature Control: Extreme temperatures, both hot and cold, can negatively impact battery performance. Maintain the battery within the manufacturer's recommended temperature range for optimal functionality.
Conclusion
Protecting your solar inverter from power surges originating from the battery is crucial for maintaining its efficiency and longevity. Implementing surge protectors, voltage regulators, and proper grounding will minimize the risk of damage. Additionally, placing the inverter in close proximity to the battery, ensuring correct wiring connections, and incorporating appropriate safety devices like fuses are essential steps in preventing issues such as sparking and tripping. By following these recommendations and maintaining a suitable environment for the inverter battery, you can enjoy reliable and uninterrupted solar power generation for years to come.

0 comments