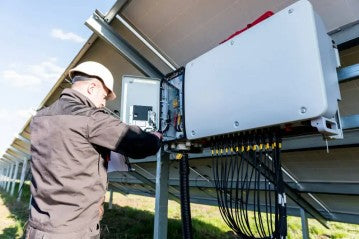
As the demand for renewable energy solutions continues to rise, solar power has emerged as a reliable and eco-friendly option for many homeowners and businesses. When setting up a solar power system, it's crucial to understand how different components work together seamlessly. In this blog post, we will explore the process of connecting an MPPT (Maximum Power Point Tracking) charge controller to an inverter, providing valuable insights for customers interested in harnessing the power of solar energy.
1. Should we connect the MPPT charge controller directly to the inverter?
When setting up a solar power system, it is not recommended to connect the MPPT charge controller directly to the inverter. The MPPT charge controller acts as an intermediary between the solar panels and the batteries, optimizing the energy flow. By connecting the charge controller directly to the inverter, you bypass the critical functions provided by the charge controller, such as regulating the charging process and protecting the batteries. Therefore, it is essential to maintain the integrity of the system by properly connecting the charge controller and the inverter.
2. How to connect an MPPT charge controller?
Connecting an MPPT charge controller to an inverter involves a few essential steps. Here's a simplified guide to help you through the process:
Step 1: Locate the DC input terminals on the inverter and identify the positive and negative terminals.
Step 2: Connect the positive terminal of the battery to the positive terminal of the charge controller. Use appropriate gauge wires to ensure proper current flow and minimize power losses.
Step 3: Connect the negative terminal of the battery to the negative terminal of the charge controller.
Step 4: Locate the DC output terminals on the charge controller and identify the positive and negative terminals.
Step 5: Connect the positive terminal of the charge controller to the positive terminal of the inverter.
Step 6: Connect the negative terminal of the charge controller to the negative terminal of the inverter.
Step 7: Ensure all connections are secure and tight to avoid any loose connections that could disrupt the flow of power.
Remember to consult the user manual provided by the manufacturer of your specific charge controller and inverter for detailed instructions on the connection process. Adhering to the manufacturer's guidelines will ensure a safe and efficient setup.
3. Can MPPT charge controllers be connected in parallel?
Yes, MPPT charge controllers can be connected in parallel to increase the overall charging capacity of the solar power system. When connecting multiple charge controllers in parallel, it is crucial to ensure that they are of the same model and have compatible settings. This ensures synchronization and optimal performance. Connecting MPPT charge controllers in parallel allows for better management of larger solar arrays, maximizing energy harvest and reducing charging times.
4. Does an MPPT charge controller always need an inverter to work?
An MPPT charge controller does not always require an inverter to function. MPPT charge controllers primarily serve the purpose of regulating the charging process of batteries from solar panels. They optimize the energy transfer by tracking the maximum power point of the solar panels and adjusting the voltage and current accordingly. This ensures efficient charging and prolongs the battery lifespan.
While an inverter is commonly used to convert the DC power stored in batteries into AC power for household or commercial use, it is not an essential component for the operation of an MPPT charge controller. However, if you wish to utilize the solar power generated by the panels for running AC appliances or feeding the excess energy back into the grid, an inverter becomes necessary.
Conclusion
Connecting an MPPT charge controller to an inverter is a critical step in setting up a solar power system. By following the correct procedures and guidelines provided by the manufacturers, you can ensure a safe and efficient connection. Remember, the MPPT charge controller plays a vital role in optimizing the charging process, while the inverter converts the stored DC power into usable AC power. Understanding the interplay between these components will help you harness the full potential of solar energy, contributing to a sustainable future.

0 comments