How Much Ventilation Does An Inverter Need?

how-much-ventilation-does-an-inverter-need

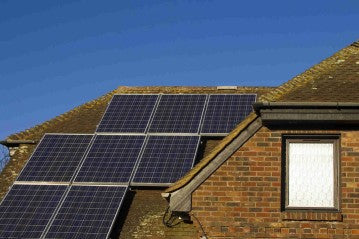
Solar energy is gaining popularity as a sustainable and eco-friendly power source. As customers consider purchasing solar energy systems, understanding the requirements of solar inverters becomes crucial. One important aspect is the ventilation and airflow needed to ensure optimal performance and longevity of the inverter. In this blog post, we will explore the topic of ventilation for solar inverters, addressing common questions and providing valuable insights for potential solar energy consumers.

1. Do Inverters Give Off Heat?

Solar inverters are electronic devices that convert the direct current (DC) generated by solar panels into alternating current (AC) for use in homes or businesses. Like any electronic device, inverters generate heat during operation. The amount of heat produced depends on factors such as the size of the inverter, its efficiency, and the load it is handling.

2. How Much Airflow Does an Inverter Need?

Proper airflow is essential to dissipate the heat generated by the inverter and maintain optimal operating temperatures. Inadequate airflow can lead to reduced performance and potentially shorten the lifespan of the inverter. Therefore, providing sufficient ventilation is crucial.

3. How Much Ventilation Does a Solar Inverter Need?

how-much-ventilation-does-an-inverter-need

The ventilation requirements for a solar inverter depend on its size, design, and the manufacturer's specifications. It is important to consult the manufacturer's documentation and guidelines to determine the exact ventilation requirements for a specific inverter model. However, we can provide some general insights:

3.1 How Much Space Does an Inverter Need?

Solar inverters typically require a certain amount of clearance space around them to ensure proper ventilation. This space allows for unrestricted airflow and helps prevent overheating. The required clearance can vary depending on the inverter's size and ventilation design, but a general rule of thumb is to provide at least 6-12 inches of clearance on all sides.

4. Where Should I Place My Inverter?

The placement of your inverter plays a crucial role in ensuring adequate ventilation. Consider the following factors when deciding on the location:

4.1 Can I Put My Inverter in A Cupboard?

Placing the inverter inside a cupboard or an enclosed space is generally not recommended. Cupboards restrict airflow and trap heat, which can lead to the inverter overheating. It is essential to provide ample space around the inverter for proper ventilation.

4.2 Does an Inverter Need to Be Outside?

While solar inverters are designed to be installed outdoors, they can also be placed indoors as long as the ventilation requirements are met. If installed indoors, ensure that the space has adequate airflow, is well-ventilated, and has sufficient clearance around the inverter. If the inverter is located outdoors, it should be protected from direct sunlight, rain, and other environmental factors that can affect its performance and lifespan.

5. Finally

When installing a solar energy system, it is crucial to consider the ventilation requirements of the solar inverter. Providing sufficient airflow and clearance space around the inverter ensures optimal performance, efficiency, and longevity. Always consult the manufacturer's guidelines and recommendations for specific ventilation requirements. Additionally, it is beneficial to work with a professional solar installer who can assess your specific installation site and provide expert advice on inverter placement and ventilation.

By understanding and addressing the ventilation needs of your solar inverter, you can optimize the performance of your solar energy system, maximize its lifespan, and enjoy the long-term benefits of clean and renewable energy.

Remember, a well-ventilated solar inverter is a happy and efficient inverter!

Leave a comment

Please note, comments need to be approved before they are published.

1. What is a Solar Controller?

A solar controller, also known as a charge controller, is a device that regulates the amount of charge that is sent to the battery from the solar panel. The controller ensures that the battery is not overcharged or undercharged, which can damage the battery and reduce its lifespan.
A solar controller works by monitoring the voltage of the battery and the solar panel. When the battery voltage drops below a certain level, the controller will allow more charge to be sent to the battery. When the battery voltage reaches a certain level, the controller will reduce the amount of charge that is sent to the battery. There are two main types of solar controllers: pulse width modulation (PWM) and maximum power point tracking (MPPT). PWM controllers are the simpler and less expensive option. They work by turning the solar panel on and off to regulate the amount of charge that is sent to the battery. MPPT controllers are more advanced and efficient. They work by constantly adjusting the voltage and current to ensure that the solar panel is operating at its maximum power point.
To build a 2000 watt solar power kit, you would need the following: solar panels and mounting hardware, an inverter, batteries, wiring and control systems, charge controllers and other accessories. You should also consider additional elements such as back-up generators and energy efficient appliances.
A 2000 watt solar panel can run a variety of household appliances, including a refrigerator, washing machine and clothes dryer, a dishwasher, lights, heating and cooling systems, and more. Depending on the size and efficiency of the appliances, it could even power an entire home.
Types of batteries in solar systems, their advantages and disadvantages, and how to choose them. In solar energy systems, batteries are critical equipment for storing solar energy. Common types of batteries used in solar systems include lead-acid batteries, nickel-iron batteries, and lithium-ion batteries. Different types of batteries have their own advantages and disadvantages, as follows: 1.Lead-acid batteries: Lead-acid batteries are the most widely used batteries in solar systems due to their relatively low cost and ease of maintenance and replacement. However, their energy density is relatively low, their lifespan is relatively short, and they require regular maintenance. 2.Nickel-iron batteries: Nickel-iron batteries have a higher energy density, longer lifespan, and are less susceptible to damage from overcharging or overdischarging. However, they are relatively expensive and heavy, and require special installation brackets. 3.Lithium-ion batteries: Lithium-ion batteries have high energy density, long lifespan, and are lightweight, and do not require regular maintenance. However, they are relatively expensive and require special charging and discharging management. When choosing a battery, several factors need to be considered: 1.Capacity: Choose a battery with a suitable capacity according to the amount of solar energy to be stored and the electricity demand of the load. 2.Working temperature: Consider the ambient temperature of the solar system and the applicable temperature range of the battery, and choose a suitable battery. 3.Cycle life: Choose a battery type and brand that is suitable for the required service life. 4.Cost: Choose a battery type and brand that is suitable for your budget. In summary, choosing the right battery for your solar system requires considering multiple factors, including capacity, working temperature, cycle life, and cost. When choosing a battery, make a reasonable choice based on your actual needs and budget.