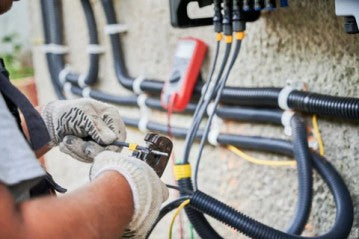
When it comes to maximizing the efficiency and performance of your solar power system, connecting solar panels to an MPPT (Maximum Power Point Tracking) charge controller is crucial. MPPT charge controllers utilize advanced algorithms to extract the maximum power from your solar panels, optimizing energy conversion and increasing overall system efficiency. In this guide, we will walk you through the process of connecting solar panels to an MPPT charge controller, ensuring an effective and efficient solar energy setup.
I. Understanding MPPT Charge Controllers
Before diving into the connection process, let's gain a better understanding of what an MPPT charge controller is and the benefits it offers.
A. What is an MPPT Charge Controller?
An MPPT charge controller is a device that regulates the charging process in a solar power system. It actively tracks the maximum power point (MPP) of the connected solar panels and adjusts the voltage and current to ensure optimal energy harvest. MPPT charge controllers are capable of converting excess voltage into additional charging current, improving the overall efficiency of the system.
B. How Does an MPPT Charge Controller Work?
MPPT charge controllers utilize sophisticated algorithms to continuously monitor the voltage and current output of the solar panels. By tracking the MPP, the controller adjusts the load to maintain the highest possible power transfer from the solar panels to the battery bank. This dynamic tracking allows for efficient energy conversion and increased power generation.
C. Advantages of MPPT Charge Controllers
MPPT charge controllers offer several advantages over other types of charge controllers, such as PWM (Pulse Width Modulation). These advantages include:
1. Higher Efficiency: MPPT controllers can achieve conversion efficiencies of up to 99%, significantly higher than traditional PWM controllers. This efficiency boost translates into increased power generation and reduced energy losses.
2. Flexibility in Solar Panel Configuration: MPPT controllers can handle higher voltage and current inputs from solar panels, allowing for flexible panel configurations, including series and parallel connections. This flexibility provides options for system expansion and customization.
3. Improved Low-Light Performance: MPPT charge controllers excel in low-light conditions, making them ideal for areas with partial shading or cloudy weather. Their ability to track and utilize available power effectively ensures consistent energy generation, even under challenging conditions.
II. Step-by-Step Guide to Connecting Solar Panels to an MPPT Charge Controller
Now, let's explore the step-by-step process of connecting solar panels to an MPPT charge controller for optimal performance.
A. Pre-Installation Preparations
1. Assessing Solar Panel Specifications
Determine the voltage and current ratings of your solar panels. This information is essential for selecting an MPPT charge controller that can handle the panel's output.
2. Selecting an MPPT Charge Controller
Choose an MPPT charge controller that matches the voltage and current specifications of your solar panels. Consider additional features, such as load control capabilities and display options, to meet your specific requirements.
3. Gathering Required Tools and Equipment
Before starting the installation, gather the necessary tools, including wire cutters, crimping tools, screwdrivers, and appropriate cables, to ensure a smooth and efficient connection process.
B. Connecting Solar Panels to the MPPT Charge Controller
1. Mounting the MPPT Charge Controller
Select a suitable location for mounting the MPPT charge controller near the battery bank. Ensure proper ventilation and easy access for maintenance.
2. Identifying Input and Output Terminals
Familiarize yourself with the MPPT charge controller's terminal labels, clearly indicating the input and output connections. Take note of the polarity markings for correct wiring.
3. Connecting Solar Panels to the Input Terminals
Connect the positive (+) and negative (-) leads of the solar panels to the corresponding input terminals on the MPPT charge controller. Double-check the polarity to avoid any reverse connections.
4. Verifying Polarity and Secure Connections
Ensure all connections are secure and tightly fastened. Use appropriate connectors or terminals to maintain reliable and low-resistance connections, minimizing energy losses.
C. Configuring the MPPT Charge Controller
1. Setting Battery Voltage and Type
Configure the MPPT charge controller to match the voltage and battery type of your system. Consult the manufacturer's instructions to accurately set the parameters for optimal charging performance.
2. Programming Load Control and Settings
If your MPPT charge controller offers load control features, program the settings according to your specific load requirements. Adjust settings such as load disconnect voltage, load reconnection voltage, and load control modes as needed.
3. Fine-Tuning Tracking Algorithm and Temperature Compensation
Some MPPT charge controllers allow fine-tuning of tracking algorithms and temperature compensation. Consult the manufacturer's documentation for guidelines on optimizing these parameters for maximum system efficiency.
III. Conclusion
By connecting solar panels to an MPPT charge controller, you can harness the full potential of your solar power system. The advanced tracking algorithms and increased efficiency offered by MPPT charge controllers ensure optimal energy conversion and power generation. Following this step-by-step guide, you can confidently connect your solar panels to an MPPT charge controller, enhancing the performance and longevity of your solar energy setup. Embrace the benefits of efficient solar power generation and unlock the full potential of clean, renewable energy for your home or business.

0 comments