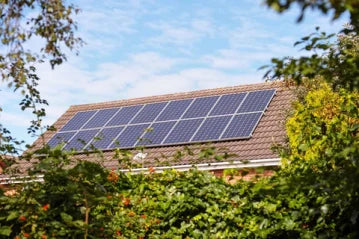
Installing a solar charge controller is a crucial step in setting up a reliable and efficient solar power system. A solar charge controller ensures that the batteries are charged optimally and protects them from overcharging or discharging. In this guide, we will walk you through the process of installing a solar charge controller, ensuring a seamless and effective operation for your solar energy system.
I. Understanding Solar Charge Controllers
Before diving into the installation process, it's important to have a clear understanding of what a solar charge controller is and the different types available.
A. What is a Solar Charge Controller?
A solar charge controller is a device that regulates the flow of electrical energy from the solar panels to the battery bank. It acts as a gatekeeper, monitoring and controlling the charging process to protect the batteries from damage due to overcharging or deep discharge. Solar charge controllers also optimize the charging efficiency, ensuring maximum power transfer from the solar panels to the batteries.
B. Types of Solar Charge Controllers
There are two common types of solar charge controllers: Pulse Width Modulation (PWM) and Maximum Power Point Tracking (MPPT) controllers.
1. PWM Charge Controllers:
PWM controllers are widely used and suitable for small to medium-sized solar power systems. They work by rapidly switching the solar panel's voltage on and off, effectively reducing the charging voltage to match the battery's requirements. PWM controllers are cost-effective and reliable, making them a popular choice for many applications.
2. MPPT Charge Controllers:
MPPT controllers are more advanced and efficient, particularly for larger solar power systems. They utilize sophisticated algorithms to track and extract the maximum power available from the solar panels, regardless of temperature or shading conditions. MPPT controllers can convert excess voltage into additional charging current, maximizing the system's overall performance.
II. Step-by-Step Guide to Installing a Solar Charge Controller
Now let's delve into the step-by-step process of installing a solar charge controller for your solar power system.
A. Pre-Installation Preparations
1. Assessing System Voltage and Current:
Determine the voltage and current ratings of your solar panels and battery bank. This information is crucial for selecting the appropriate charge controller.
2. Selecting the Appropriate Charge Controller:
Based on the system voltage and current, choose a solar charge controller that matches your requirements. Ensure it has the necessary capacity to handle the solar panel and battery bank specifications.
3. Gathering Required Tools and Equipment:
Before starting the installation, gather the necessary tools, including wire cutters, crimping tools, screwdrivers, and appropriate cables, to ensure a smooth installation process.

B. Installing the Solar Charge Controller
1. Mounting the Charge Controller:
Select a suitable location near the battery bank for mounting the charge controller. Ensure it is well-ventilated, away from direct sunlight, and easily accessible for maintenance.
2. Connecting the Solar Panels:
Connect the solar panels' positive and negative leads to the corresponding terminals on the charge controller. Ensure proper polarity and secure connections to prevent any voltage drops or loose connections.
3. Connecting the Battery:
Connect the battery bank's positive and negative terminals to the respective terminals on the charge controller. Double-check the polarity to avoid any reverse connections, which could damage the charge controller and batteries.
4. Connecting the Load:
If you have a load or electrical appliances connected to your system, connect them to the load terminals on the charge controller. Ensure proper sizing and secure connections to accommodate the load's power requirements.
C. Wiring and Cable Management
1. Proper Cable Sizing and Selection:
Use appropriately sized cables based on the system voltage, current, and length requirements. Oversized cables can result in unnecessary losses, while undersized cables may lead to voltage drops and reduced performance.
2. Ensuring Correct Polarity:
Pay careful attention to the polarity when making connections. Improper polarity can damage the charge controller and other system components. Double-check and verify all connections before finalizing the wiring.
3. Managing Cable Routes and Securing Connections:
Route the cables neatly and securely, ensuring protection from physical damage and exposure to environmental elements. Use cable clips or conduits to organize and secure the cables, maintaining a clean and professional installation.
D. Configuring the Solar Charge Controller
1. Setting System Parameters:
Configure the charge controller according to the specifications of your battery bank. Set the battery type (e.g., lead-acid, lithium-ion), voltage thresholds, and other parameters as per the manufacturer's guidelines.
2. Programming Charge and Load Settings:
Adjust the charge controller settings to meet your desired charging profile and load requirements. Some charge controllers offer programmable options for specific charging algorithms or load control features.
3. Fine-Tuning MPPT Charge Controllers:
If using an MPPT charge controller, consult the manufacturer's documentation for any additional configuration options. Fine-tuning parameters such as the tracking algorithm or temperature compensation can further optimize the controller's performance.
E. Testing and Monitoring
1. Verifying Proper Functionality:
Once the installation is complete, perform a comprehensive system test to ensure the charge controller is operating correctly. Monitor the charging process, battery voltage, and load operation to validate the system's functionality.
2. Monitoring Performance and Troubleshooting Tips:
Regularly monitor the charge controller's performance, battery state of charge, and any error codes or alarms displayed. Refer to the manufacturer's documentation for troubleshooting guidance in case of any issues or anomalies.
III. Conclusion
Proper installation of a solar charge controller is essential to maximize the performance and longevity of your solar power system. By following this step-by-step guide, you can ensure a seamless and efficient installation process. Remember to select the right charge controller, make secure and correct connections, and configure the settings according to your system requirements. A well-installed solar charge controller will help you harness the full potential of solar energy while protecting and extending the lifespan of your batteries.

0 Kommentare