Solar energy has gained tremendous popularity in recent years, and it's no surprise why. With its eco-friendly nature and long-term cost-saving benefits, harnessing the power of the sun through solar panels has become a sought-after solution for homeowners and businesses alike. In this blog post, we will provide a professional and comprehensive guide on how to install ground-mounted solar panels. Whether you're a first-time solar panel buyer or looking to expand your existing system, this guide will equip you with the knowledge to make informed decisions and embark on a successful solar energy journey.
Understanding Ground-Mounted Solar Panels
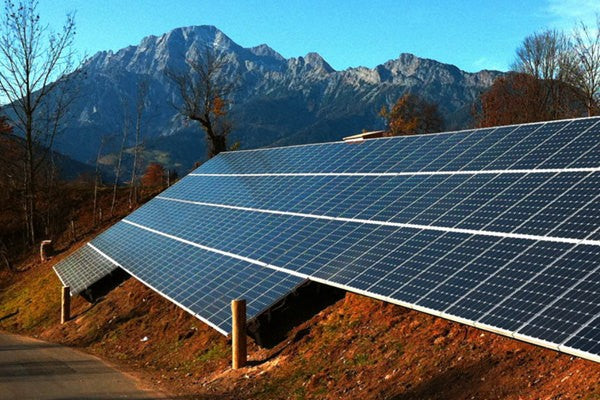
Before diving into the installation process, it's important to understand what ground-mounted solar panels are and their advantages over other types of solar panel systems. Unlike rooftop installations, ground-mounted solar panels are positioned on the ground using a mounting structure. This offers flexibility in panel orientation, maximizes energy production, and eliminates the need for roof modifications. However, factors like location, orientation, shading, and soil quality must be considered to ensure optimal performance and longevity.
Preparing for Installation
To begin your ground-mounted solar panel installation, conduct a thorough site assessment. Assess the available space, analyze solar energy potential, and determine the ideal positioning for maximum sunlight exposure. Additionally, obtain the necessary permits and permissions required by your local authorities. Evaluating soil quality is crucial as it impacts the foundation requirements. Conduct soil tests to ensure stability and identify any potential challenges that may arise during the installation process. Lastly, calculate the appropriate panel capacity and quantity based on your energy needs.
Gathering the Equipment and Materials
To proceed with installation, you'll need to gather the necessary equipment and materials. When selecting solar panels, consider their efficiency, durability, and warranty. Opt for racks and mounting systems that are sturdy, corrosion-resistant, and suitable for your installation site. Don't forget to gather the required tools and equipment such as drills, wrenches, and wire cutters. Additionally, gather materials like wiring, conduit, grounding components, and junction boxes to ensure a seamless installation process.
Installation Process
1. Clearing and preparing the installation area: Begin by clearing the designated area of any obstructions such as rocks, debris, or vegetation. Level the ground to create a stable foundation for the solar panels.
2. Setting up the foundation and leveling the ground: Install the foundation posts or concrete footings based on your site assessment. Ensure that the foundation is level and secure to provide a sturdy base for the panels.
3. Assembling the mounting structure and attaching the racks: Follow the manufacturer's instructions to assemble the mounting structure and attach the racks securely to the foundation. Double-check the alignment and make any necessary adjustments.
4. Wiring the solar panels and connecting them to the system: Connect the solar panels in series or parallel configurations, as recommended by the manufacturer, to achieve the desired voltage and current. Run the wiring from the panels to the system's electrical components, such as inverters and batteries.
5. Ensuring proper grounding and electrical safety measures: Install grounding components to ensure electrical safety and protect against power surges. Follow local electrical codes and regulations to ensure compliance and safety.
6. Performing a thorough inspection before commissioning: Before commissioning your ground-mounted solar panel system, inspect all connections, wiring, and components to ensure everything is secure and functioning properly. Make any necessary adjustments or repairs.
Testing, Commissioning, and Maintenance

Once the installation is complete, it's time to test and commission your solar panel system. Verify its performance by monitoring the energy output and ensure that it's properly integrated with the grid or off-grid system. Implement a regular maintenance schedule to keep your panels clean, monitor system performance, and address any issues that may arise. Routine inspections and professional assistance can help troubleshoot any technical or performance-related concerns, ensuring the longevity and efficiency of your solar panel system.
Maximizing the Benefits of Ground-Mounted Solar Panels
To make the most of your ground-mounted solar panel system, consider additional enhancements. Tracking systems can optimize energy production by adjusting panel orientation to follow the sun's path throughout the day. Incorporating battery storage allows you to store excess energy for use during low sunlight hours or power outages. Explore net metering and feed-in tariff options to potentially earn credits or financial incentives for excess energy generated. Lastly, keep in mind the scalability of your solar panel system, as you may want to expand it in the future.
Conclusion
By following this comprehensive guide, you're now equipped with the knowledge and steps necessary to install ground-mounted solar panels successfully. Solar energy is an investment that not only benefits the environment but also offers long-term cost savings. Remember, seeking professional assistance when needed is essential to ensure the safety and efficiency of your solar panel system. Embrace the power of solar energy and take the first step towards a sustainable and eco-friendly future for yourself and generations to come.
0 Kommentare